The validity rule is an important concept in precision shaft alignment. It can be used to confirm that your readings are accurate and is why we don’t have to rotate a full 360 degrees in order to get accurate alignment information.
Here is a previous blog post with an embedded video that discusses dial indicator concepts including the validity rule.
Dial Indicator Concepts – TIR, The Validity Rule and True Position Sensing
To check the validity rule with your Fixturlaser Laser Shaft Alignment System:
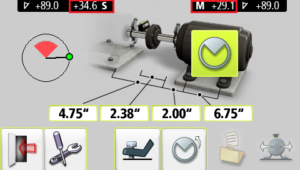
1 – Sensors are mounted and rolled to the 12 o’clock position. A measurement is recorded which sets the S & M Detector values to zero (red boxes) as well as the angle values.
S Sensor M Sensor
Angle Detector Value in Mils Detector value in Mils Angle

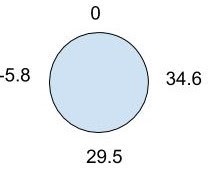
2 – Roll the sensors 90 degrees to the 3 o’clock position. Note the TIR values.
S = +34.6mils, M= +29.1mils

3 – Roll 90 degrees to the 6 o’clock position. Note the TIR values.
S = +29.5, M= +43.3

4 – Roll 90 degrees to the 9 o’clock position. Note the TIR values. S = -5.8, M= +14.8

The validity rule states that the sum of the readings at the top and bottom (12 and 6) should equal the sum of the readings side to side (3 and 9).
Stationary Moveable
(12 + 6) = (3 + 9) (12 + 6) = (3 + 9)
(0 + 29.5) = (34.6 + (-) 5.8) (0 + 43.3) = (29.1 + 14.8)
(29.5) = (28.8) (43.3) = (43.9)


Typically, the validity rule is considered satisfied if the readings are within +/- 10 %.


