

It’s 3:30 on Friday afternoon. You were supposed to be home by now. It’s Memorial Day weekend, and the car’s been packed up since Wednesday. The kids are ready to go, and your wife ran out of things to keep them occupied forty-five minutes ago.
As you wipe the sweat from your forehead, it burns along a new laceration on your fingers from a four-thou shim. “How did I get here?” you ask yourself. You’ve been trying to get this alignment in spec for hours, but it just won’t stick. It’s not bolt-bound, that much is true; nor is it base-bound. So what’s the deal?
It’s soft foot. It’s always soft foot. It’s always been soft foot. Just admit it.
75% of misalignment is a result of a soft foot condition. This is a real statistic.
The game was rigged from the start; it doesn’t matter how new and sophisticated your laser is. That soft foot will have you chasing your tail until you eliminate it. This is much easier to do with a calm approach, so learn to eliminate your soft foot condition right after you verify the machine is misaligned.
Let’s start over and take it from the top. The following is a succinct series of steps and tips that I have found success with.
1) The Comprehensive Soft Foot Toolkit
There are a few things to keep in your bag that will make this much easier on you. Most of these items you probably already have on hand.
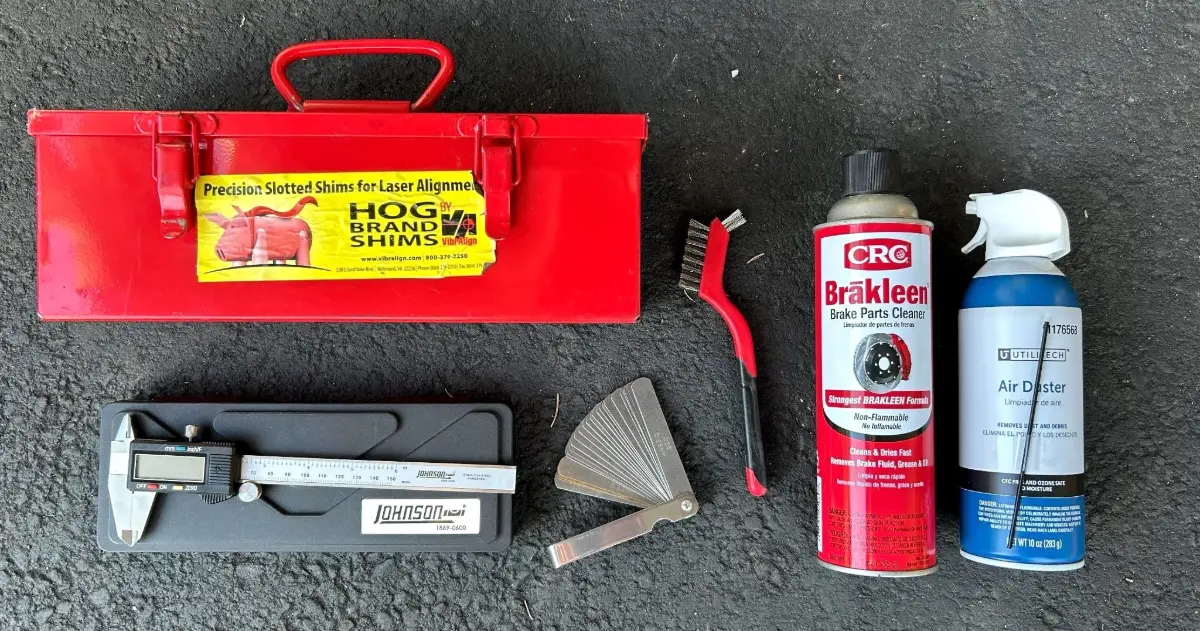
- Fresh Shims – You’ll need these anyway, but they’re also important for your pre-alignment rundown. There’s a good chance some of the existing shim packs will be corroded, stuck together, painted, etc. We’ll get into that later.
- Calipers – Economy digital calipers work just fine. You’ll use these to measure shim packs as well as your thicker, non-machined shims.
- Feeler Gauge – Nicer ones have a tendency to not.. explode. If you’ve ever had a feeler gauge’s bolt disengage on site, it’s like playing 52 pick up with air. A feeler gauge is ideal for hunting around feet, looking for gaps since you won’t damage your fresh shims this way.
- Wire Brush – You’ll want something skinny with a smaller footprint. We want to clear that debris underneath the feet. Remember: any sort of dust, rust, particles, or paint is adding mils.
- Brake/Carb Cleaner – This is a nice backup to have in the event you’ll need to maintain OEM shims or custom-cut shims that have been ‘gunked up,’ as we often say. If we can’t use fresh shim stock, this will have to do (often pairs well with a box of rags).
- Can of Air – These are also great to have to blow out debris underneath the feet. You can also buy electric air dusters that won’t run out of compression if you find the mileage on cans unsatisfactory.
- Patience (not pictured) – The most valuable tool in our kit. You’ll want to stock up on this stuff before heading on site. Diagnosing and eliminating soft foot isn’t very glamorous or rewarding until you’re walking out the door. Remain steadfast in your objective even in the face of adversity.
2) So, what exactly is Soft Foot?
It’s what’s keeping you in this pump room all afternoon. It’s the plant manager hanging over your shoulder, wondering what’s taking so long. It’s the new guy you brought along who’s been less than candid about their poor choice of agreeing to join you.
Sorry. Sometimes, the flashbacks come to me, and I can’t deny them. Technically, a soft foot condition is when one or more of the machine’s mounting feet do not make firm, even contact with the base or foundation.
We usually compare this to sitting in a wobbly chair; throw a few coasters under your short leg and you’re good to go. You’ve just eliminated your chair’s soft foot condition. This may simplify it too much, though. Since our machine feet and base(s) are planar (and hopefully machined properly), the chair analogy leaves out the minutiae. We will need to do a bit more investigating than simply elevating a chair leg. Your new toolkit will come in handy.
3) Inspection
After verifying misalignment (important), let’s take a look at our motor’s feet. A few things can be determined straight off the rip without loosening any bolts.
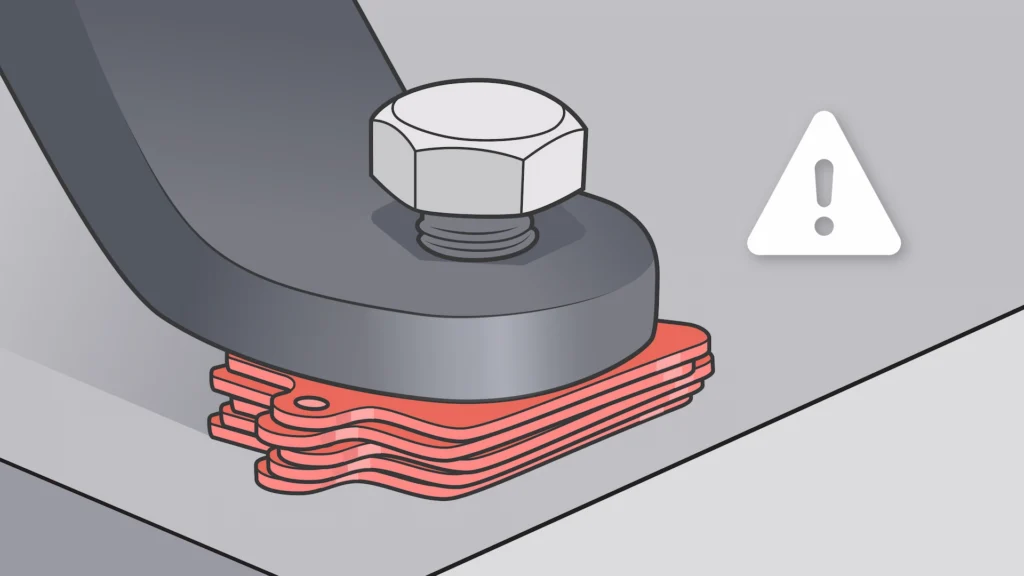
- How many shims are under each foot? More than 3-4 shims turns into a spring – they call that squishy foot. We will need to consolidate shim packs if so.
- Use your flashlight to investigate any angularity on the feet themselves. Are they flat or angled? Does light pass through? We may need to step our shims if so.
- Are the shims painted over? Has process material or liquid breached this base, the shims, and possibly the feet? We will benefit from replacing these shim packs with fresh ones if so.
4) Get Loose
Loosen all four bolts and re-run your inspection circuit. For this blog, we are going to assume the shims are rusty and gunked up, otherwise trashed. Keep in mind, it doesn’t take much to change your millage.
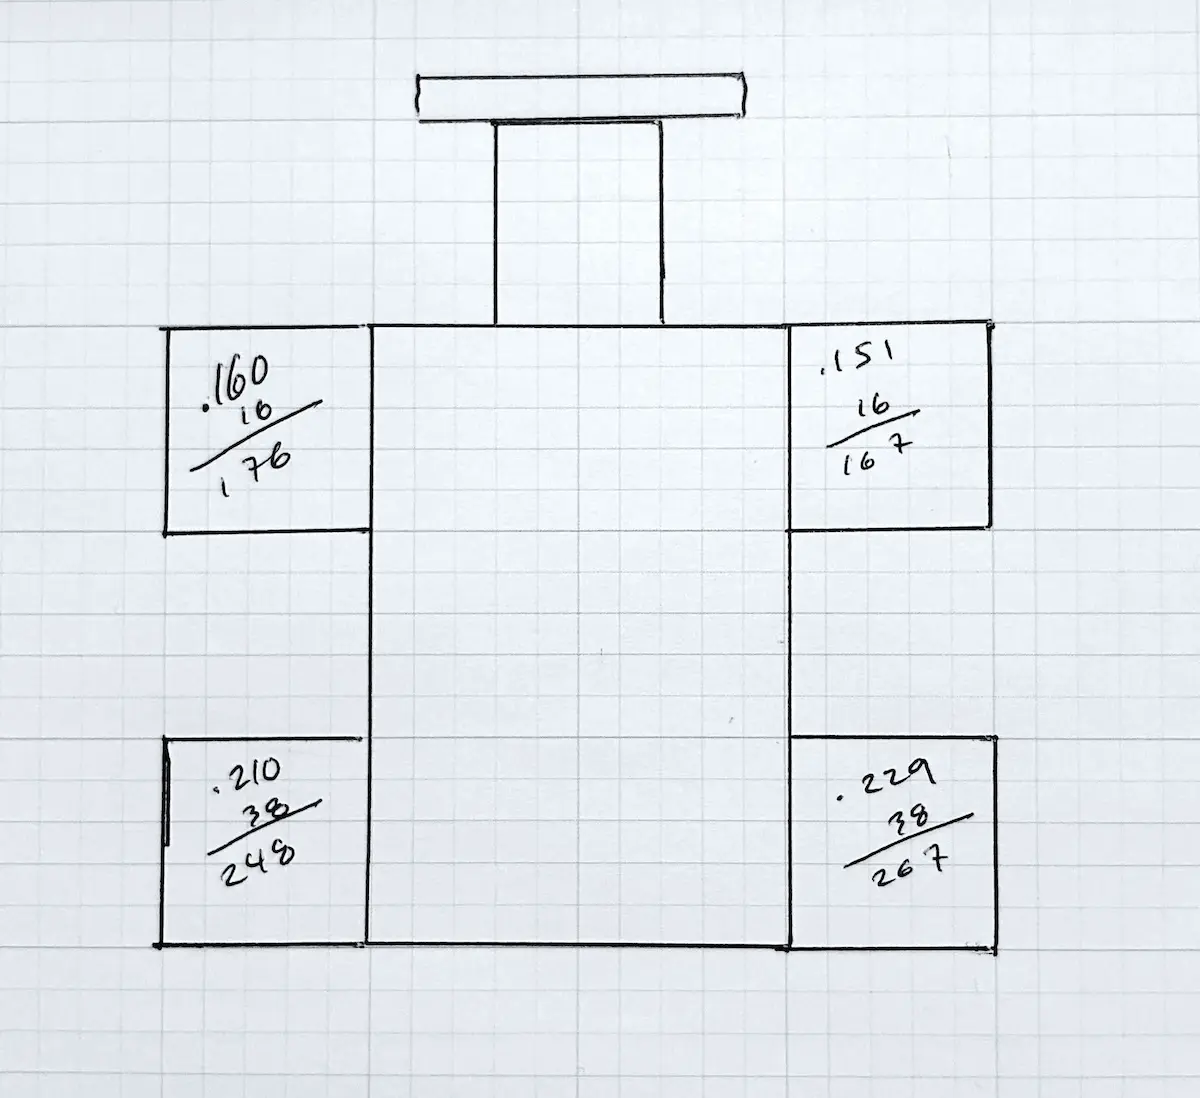
- Pull one shim pack and (hopefully) without pulling them apart, measure the thickness of that pack with your calipers. Whatever that number says, recreate that pack with the least amount of fresh shims possible. Don’t even read the old ones. I will often make a diagram in my notebook of what I placed under each foot so I can easily condense when making adjustments later.
- Hit the base and bottom of the machine foot with your cleaner and a rag. Wire brush if necessary, and finally blow out any debris. You may need someone on the pry bar for this one.
- Repeat this for the remaining three feet and let it float (loose bolts).
At this point, you have managed to create total control over your existing machine setup (in regard to alignment). Think of it as starting over on your own terms, which you can easily verify. The name of the game here, for me, is eliminating variables. With all feet loose, let’s find our culprit.
- Grab your feeler gauge and slide out your .002” blade (.002” is soft foot tolerance).
- Take your time and try to slide this blade under each foot while the entire machine is floating (not bolted down).
- Note which feet you can fit .002” or more under (keep sizing up the blades until it won’t slide under the foot anymore),
In most cases, you will find that you have one foot floating with a soft foot condition. This can create a “rocker” that pivots back and forth diagonally. Rarely, you will find two parallel feet with a soft foot condition. Parallel soft feet can be indicative of a non-flat base.
- Fill the gap under the problematic foot (or feet) with the required shim thickness and remember to consolidate your shim pack in the process. The fewer shims, the better.
5) Get Tight
Go ahead and tighten all four bolts in a star pattern to get in the habit for this machine (use the same pattern every time). Be mindful of anything out of the ordinary as you tighten the bolts down to operating torque. You’ll also want to prevent threading your shims or cupping washers. Do your shims cover the entire footprint? They should.
- After all bolts are tightened, loosen one bolt and try to slide that .002” blade under that foot. If .002” or more can slide under your single, loose bolt, fill that gap with a shim (consolidate!).
- Tighten the bolt you just checked (and maybe shimmed) down and repeat this process for the remaining bolts. It is likely that one foot will retain a bit of soft foot during this step, so don’t get freaked out if you still have some shimming to do.
Remember, we’ve created this environment for maximum control, precision, and ease. The more control and insight you have over your machine feet, the easier it will be to perform your alignment. Sounds like overkill until it’s not.
Go ahead and start your precision alignment with the laser.
6) BONUS – All the Shim Tips Fit To Print
- Always measure your stamped shims (usually anything thicker than .025”) with your caliper, as they are less accurate than the machined ones. If a shim is .002” off from its indicated thickness, you’re making your own soft foot condition. If there are small differences, note them in your helpful diagram.
- Always measure your shim packs with your caliper to verify that they are what you need them to be. Record these values in your diagram.
- We went over this earlier, but do your best to maintain 3-4 shims max under each foot. Anything more than four and you’re creating a spring (squishy foot). If your shim box is lacking, it’s like having part of a tool. Take that part seriously.
- Sandwich thin shims between thick shims.
- Oh, and watch your fingers.
Eliminating soft foot is one of the most important steps toward achieving accurate, repeatable shaft alignment. Whether you’re troubleshooting a stubborn alignment job or looking to improve your precision maintenance techniques, we have the tools and training to help you get it right the first time. Our training courses cover the fundamentals, best practices, and real-world challenges you’ll face in the field, while our laser shaft alignment solutions help you identify soft foot, make precise adjustments, and get your machines back within tolerance.
Have questions about soft foot, shaft alignment, or other precision maintenance challenges? Reach out to our team of experts. We’re here to help you troubleshoot problems, find the right solutions, and keep your machines running reliably.